<<<
etheli.com ArduVidRx
Bluetooth Modules for ArduVidRx
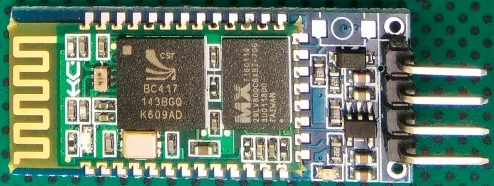
HC-06
The HC-06 is a good, cheap Bluetooth module that can be used as
the serial-communications link between an Arduino-based unit (like an
ArduVidRx receiver) and an Android phone/tablet or a computer.
The modules are available from several vendors on eBay:
Wireless RF Transceiver Bluetooth HC-06 Slave Module RS232/TTL for
Arduino
http://www.ebay.com/itm/111881989869
http://www.ebay.com/itm/121829386084
http://www.ebay.com/itm/351626705993
An adapter like this one can be built to allow the HC-06 to be
connected to an FTDI-style 6-pin connector:
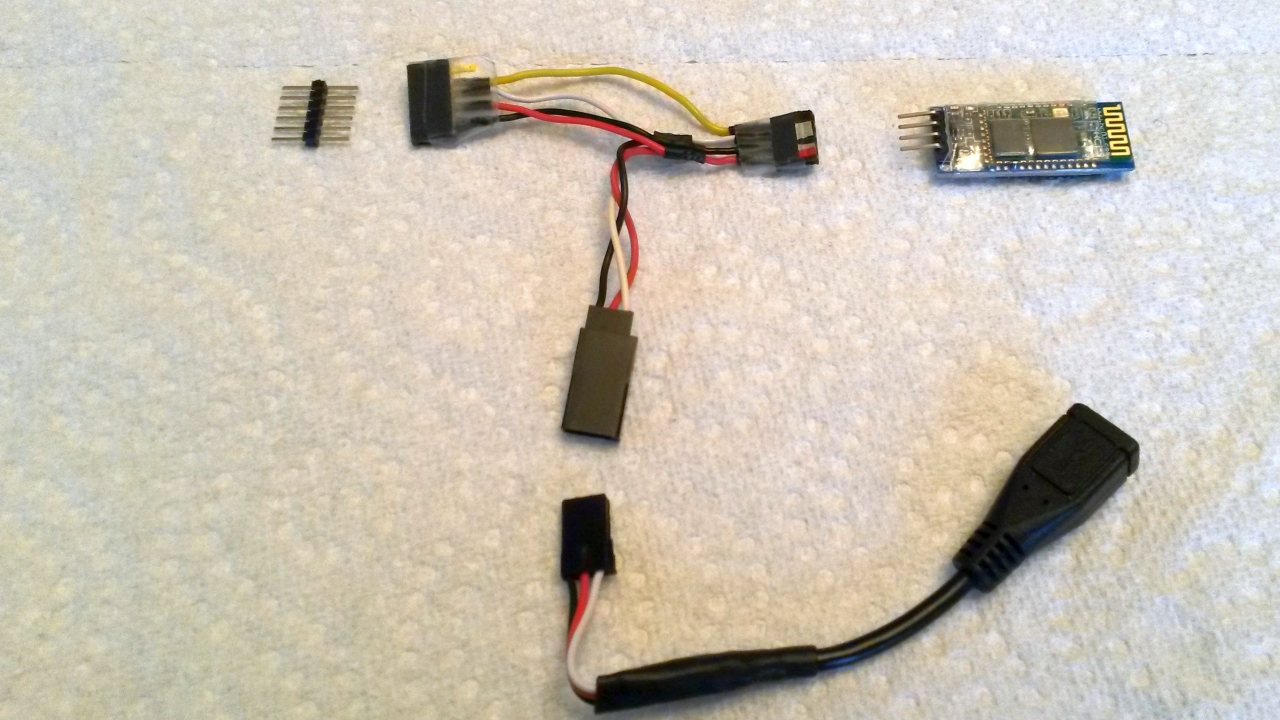
The adapter is wired so the VCC(+5V), GND, TX and RX lines on the HC-06
feed through to the corresponding lines on the FTDI
(6-pin) connector. This adapter also has a servo
connector picking up the +5V and GND lines (to allow its use as a power
source) and the RX line (which could be used to feed commands to a
"slave" ArduVidRx receiver).
The other adapter-wire in the picture has a mating servo plug with its
+5V
and GND lines wired to a USB micro connector, allowing a cell phone
charger to be used as a power source (an extension
cable can be cut in half to get a USB-micro pigtail).
Here is a source for the female headers: 2pcs 40Pin
2.54 mm Single Row Female Header
These headers have long pins on both sides making them good for use as
mating adapters:
20mm 2-sided 1x40-pin 2.54mm Breakaway Male Header - Double Sided
http://www.ebay.com/itm/141657908407
https://www.adafruit.com/products/400
Another option is this mounting by BobD (click on pic): 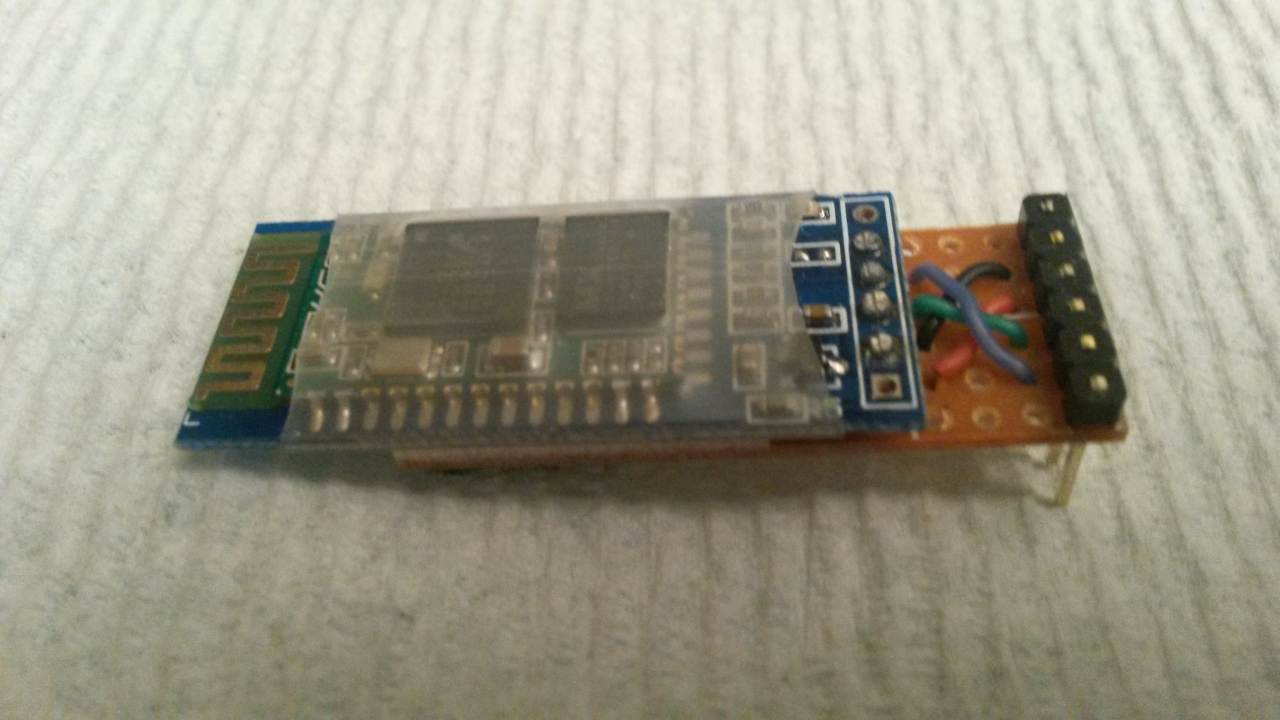
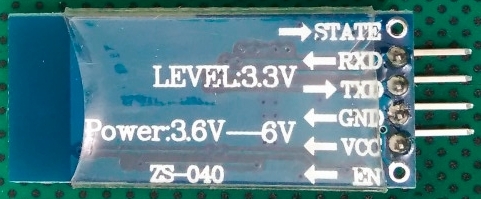
HC-06 Configuration
The HC-06 modules tend to arrive with a default setup of 9600 baud, so
they need to be set to 115200 baud for use with an ArduVidRx
receiver. It can also be good to setup a custom (unique) name on
each module. The way to do this is to connect an FTDI adapter to
the HC-06, plug the FTDI into a computer to send configuration commands
to the HC-06 using a terminal-emulator program like TeraTerm (old link).
When the FTDI adapter is plugged in to the computer, there should be a
COM port assigned to it (i.e., "COM7").
The instructables web page AT command mode of HC-05 and HC-06 contains a
detailed set of steps and options for configuration. Here are
some notes and an outline of the steps:
The HC06 does not wait for any termination character
for each AT command entry. Instead, it acts to whatever character you
entered after one second. Hence, if you are not able to complete a
command entry within a second, it will be ignored. Because of this
behavior, it may be extremely difficult to do manual entry
configuration using Windows Hyper-terminal software. Terminal software
that allows batch sending of multiple characters must be used. I found
that arduino works fine. On the other hand, if you use Tera term you
have to write down the AT commands in a notepad, than copy-paste it to
Tera term. Right clicking on Tera term console will automatically paste
the copied line and execute immediately. No need of pressing 'Enter'.
The command will be executed immediately and confirmed.
HC 06 AT commands:
AT : check the connection
AT+NAME: Change name. No space between name and command.
AT+BAUD: change baud rate, x is baud rate code, no space between
command and code.
AT+PIN: change pin, xxxx is the pin, again, no space. (default is 1234)
Steps:
- Connect with terminal emulator set to starting (default)
baud rate, usually 9600
- Sending "AT" should result in "OK" response
- Set new name: AT+NAMEDESIREDNAME
- Set baud rate to 115200: AT+BAUD8
- Unplug and plug back into the computer
- Connect with terminal emulator set to the new baud rate,
115200
- Sending "AT" should result in "OK" response
When connecting wirelessly to the module, it should appear with
the configured name. A detailed datasheet for the HC-06 is here.
----
Additional information on variants of these modules may be found on
this Bluetooth Modules page.
The SparkFun
Bluetooth Mate Silver WRL-12576 module costs more than the
HC-06, but it is easier to wire and setup.
The connector has the same pinout as an FTDI adapter, so the
module may
be plugged directly into an ArduVidRx receiver. A 6-position
female header can be soldered onto the module (using this Female
Header),
and a 2-sided pin header used to make the connection (using this Double
Sided Header). The 2-sided pin header could setup as straight
through or right angle.


The default baud rate on the module is 115200, so it does not
need to
be changed. The one thing that usually should be customized is
the
device name. The module may be configured with commands sent via
the wired port or the wireless bluetooth connection. The RN-42 AT Command Set v6.15 document describes the command set in detail.
To configure the module via the wireless bluetooth connection, a
computer or a smart phone/tablet with a Bluetooth adapter is
needed. A terminal emulator is also needed, such as TeraTerm (computer) or BlueTerm
(Android device), to enter the commands. Here are some notes from
the RN-42 AT Command Set v6.15 document and an outline of the steps for
setting the device name:
Type $$$ into the terminal emulator to enter command
mode. (If you do not enter command mode within the configuration window
(60 seconds), the module enters fast data mode.)
The module returns the string CMD, which indicates that your
connection and terminal settings are correct. While in command mode,
the module accepts ASCII bytes as commands. When you enter a valid
command, the module returns AOK. It returns ERR for an invalid command
and ? for unrecognized commands. Type H<cr> to see a list of
commands.
A quick check to confirm that you are in command mode is to type
the X<cr> command after entering command mode. This command shows
the a summary of the module’s current settings, such as the Bluetooth
name, device class, and serial port settings.
Steps:
- Supply +5V power to module
- Do Bluetooth pairing of module with computer or phone/tablet (default PIN is 1234)
- Open connection to module using terminal emulator
- Type $$$ into terminal emulator (within 60 seconds of module startup)
- Type H<cr> to see a list of commands (to verify connection)
- Set new device name: SN,NewDeviceName<cr>
- Type X<cr> to see current settings, including device name
- Close terminal emulator
- Unpair/remove Bluetooth entry for module on computer or phone/tablet
- Power down module, then power it back on
- Do Bluetooth pairing of module with computer or phone/tablet (should now appear with new device name)
Click here to contact me
Back to etheli.com home page