Update: Check out my brushless BL_Beta75 build
that has everything that this one has, plus Crash-flip (anti-turtle)
(aka "meow") mode and FrSky receiver with F.Port 2-way telemetry.
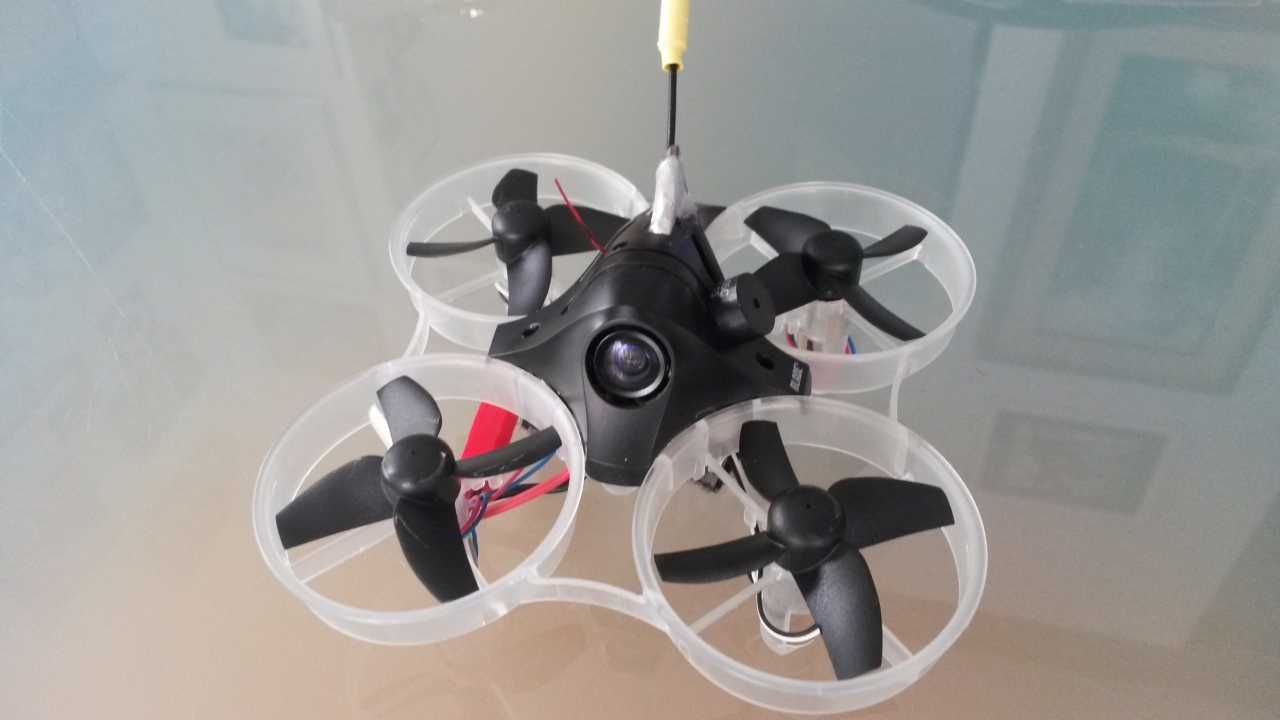
This article describes my DIY build based on the FPV Inductrix+. The stock Blade Inductrix FPV + from Horizon is a really good quad; it flies well and is durable. The things I wanted to get in my own build were:
Betaflight-compatible flight controller
FrSky-compatible receiver
On-screen display (OSD) on video
Video-transmitter frequency configurable through OSD or command-line interface (CLI)
The thing the stock version has that this one doesn't is "meow"
mode (which allows you to flip the quadcopter back upright after a
crash by quickly reversing the motor direction). Potential
remedies for this would be to go to a build with brushless motors, or
for a vendor to come out with a flight controller for brushed motors
that supports reversing the motor directions.
The weight (complete) without battery is about 41g. (The stock Inductrix+ weighs 35.5g.)
Here are some other weights:
TBS Unify PRO 5G8 V2 Transmitter + BoldClash camera = 5.1g
TBS Unify PRO 5G8 V2 Transmitter = 3.5g
BoldClash camera = 1.6g
Buzzer = 0.9g
Stock canopy = 2.0g
The motor diameter is 8.0mm (not 8.5mm), and the motor-to-motor distance is 75mm (diagonal).
Flight time with a 1S 600mAh battery is about 4 minutes.
Notes:
The CL-8020-14 motors are a very tight fit going into the frame.
I used a heat gun to warm up the mounts and motors while pushing them
in.
I used the TBS Unify Pro 5G8
video transmitter (VTX), which supports SmartAudio for configuring the
frequency and power output. If the SMA-antenna-pigtail connector
is replaced with a micro linear antenna, the weight is about 3.5g. The VTX is mounted vertically, and a slot is cut into the canopy for it (see pic).
I found that if the VTX was mounted with its 4-pin connector near the
flight controller, the VTX would pick up noise when the motors were
run. Flipping over the way it is mounted cleared up the noise.
The VTX SmartAudio configuration support requires a connection from the
audio pin of the TBS Unify VTX to the "TX" line of a UART on the flight
controller. (See here for info on SmartAudio.)
The BetaFPV flight controller does not provide pads for the extra UART
lines, so a wire needs to be tack-soldered onto the necessary
pin. The UART3 "TX" line is pin 21 on the F3 processor (see pinout).
I used 36AWG teflon coated wire.
The main trick is to use rosin flux. If you put a bit of solder on the
end of the wire, tape the wire (or wires) in place, brush on some
rosin, and apply heat from a fine-tipped soldering iron, the solder
should flow into place. (I use this Rosin Flux Pen.)
I installed wires onto both the "TX" and "RX" lines of UART3 so I could
have the option of connecting a bluetooth module; see here for pics. I ran the wires to a two-pin Micro-JST-1.25 socket connector.
With the VTX setup for SmartAudio configuration, the video frequency
can be configured using the on-screen video display and the R/C
transmitter sticks; see the SmartAudio CMS OSD guide
in the Betaflight wiki for more information. The video frequency
may be set using band/channel values, or to a frequency in MHz.
With the upcoming v3.3 release of Betaflight, the video frequency may
be configured using CLI settings. More info and a development
build supporting the new CLI settings may be found here.
(At first I was looking at using the FuriousFPV Stealth VTX,
but didn't use it because it seemed to only support the fixed set of 40
channels, even when being configured to other frequencies in MHz).
The BetaFPV flight controller provides a +5V supply that should have
enough power to run a 25mW video transmitter and micro camera.
The TBS Unify Pro 5G8 VTX can run at 25mw or 200mW (or even higher), so
I wired a a Pololu S7V7F5 5V regulator from the battery to the +5V for the VTX and camera.
I had on hand a Boldclash F02 Separated Type Camera/VTX,
so I used the camera from that combo. It fit into the stock
canopy mount (with its connector facing upward into the canopy).
A buzzer can be connected with the buzzer's positive lead wired to the red
LED on the BetaFPV flight controller and the buzzer's negative
lead wired to ground. See here for a pic of the connection. I used a CUI Small Buzzer CX-0905C.
The two-pin Micro-JST-1.25 socket connector I soldered onto the BetaFPV
F3 board to the 'Camera' and 'VTX' pins would have been better as wires
to a connector, as a connector there tends to collide with part of the
canopy (the camera-mount post). With squeezing and nudging I got
it to fit, but it's tight.
Update: On my original build I had the prop rotation
opposite the original Cleanflight "standard." With the way the
motor supports on the frame are angled, the air flow is more efficient
for the "standard" rotation, so I switched to that (by moving the
motors and swapping which motor connectors are used; 1 <-> 2, 3
<-> 4).
The BetaFPV F3 flight controller is mounted with its USB connector
facing forward so it is clear of the battery-mount part of the
frame. The 'align_board_yaw' setting is put at 180, and
'resource' commands are used to map the motor connectors.
See here for a minimal configuration set, and here for a configuration I've been using (in the settings directory).
See here for my Taranis Q X7 transmitter-settings file for this model.
To hold the 750mAh packs onto the frame, pieces of velcro can be taped to the bottom (see pic). Battery pigtails can be attached to TP4056 5V 1A Charging Boards to create cheap and easy chargers.